Proxy Docker Container dengan WSL dan NGINX di Windows
WSL mempermudah integrasi dengan aplikasi di Linux
Latar Belakang
Nah, suatu saat saya mau buat proxy di Windows. Salah satunya menggunakan NGINX. NGINX menyediakan proxy di Windows yaitu ini:
Tetapi, langkah-langkah tersebut bisa saja memusingkan. Lalu, bagaimana kalau kita coba menggunakan WSL?
Post ini didedikasikan untuk melengkapi kelas Belajar Implementasi CI/CD dari Dicoding. Namun, tidak menutup kemungkinan bisa dilakukan untuk kasus yang umum.
Persiapan
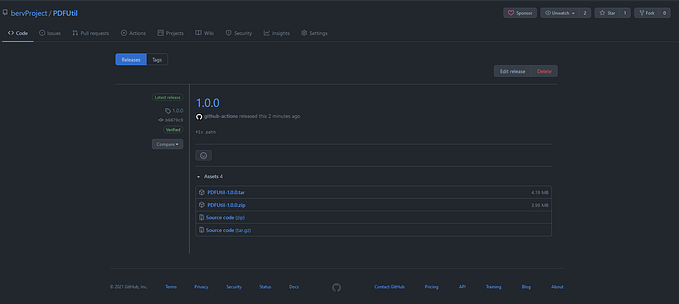
- Sudah ada Docker Container yang sudah siap.
- WSL yang sudah siap.
Integrasi WSL dengan Docker
Oke, biar lancar. Kita perlu integrasi WSL dengan Docker. Saya asumsi Anda telah menggunakan Docker Desktop ya. Kalau belum, saya tidak menjelaskannya di sini.
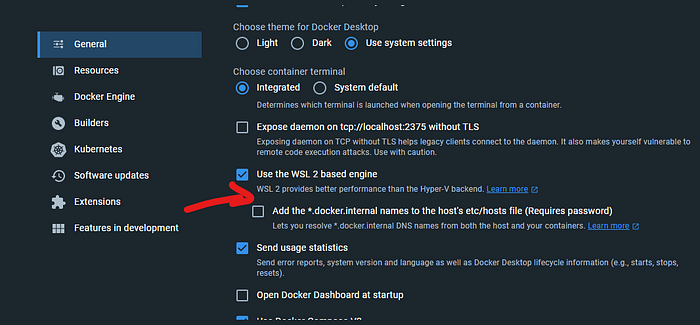
- Buka Docker Desktop. Klik Gear.

- Pastikan opsi WSL 2 ini sudah tercentang ya.
- Klik ke Resources di sebelah kiri.
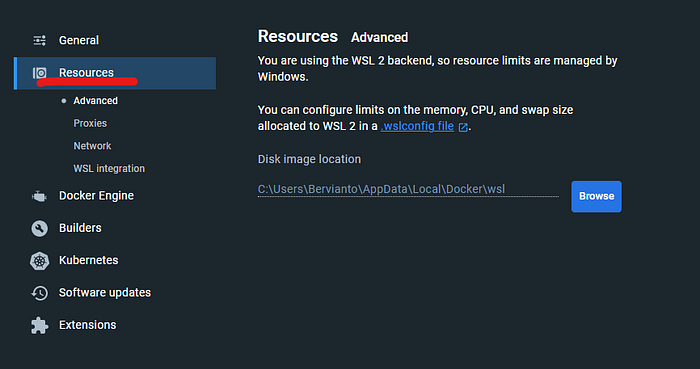
- Klik WSL Integration dan pastikan “Enable integration” sudah tercentang dan yang additional juga sudah menyala untuk lebih pasti.

Install NGINX di WSL
Ini sebenarnya bergantung distronya ya. Saya asumsi sama dengan saya yaitu Ubuntu.
- Mari kita update dulu.
sudo apt update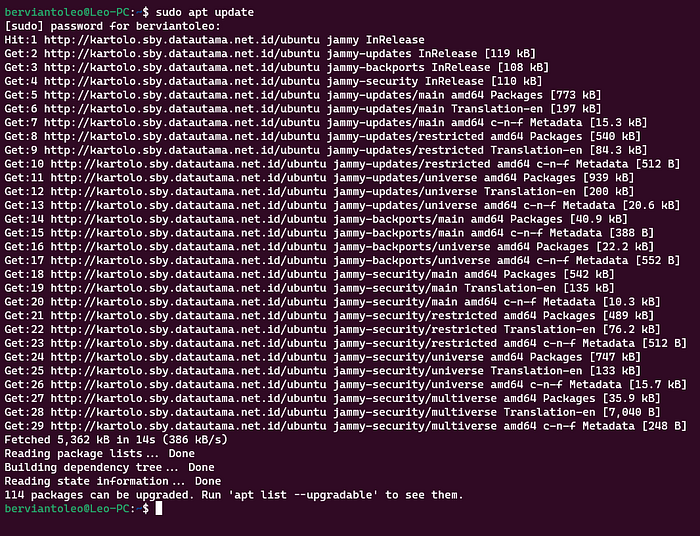
- Setelah berhasil, cukup install nginx dengan perintah berikut:
sudo apt install nginx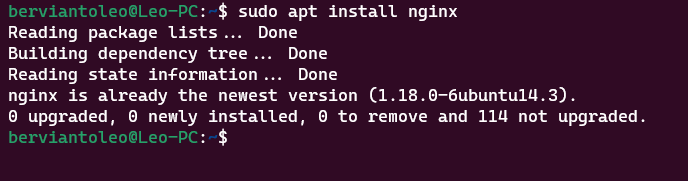
Kebetulan karena saya sudah pernah menginstall maka akan diberitahu bahwa sudah terbaru.
- Oke, saatnya konfigurasikan portnya. Saya akan edit default site. Edit file berikut “/etc/nginx/sites-available/default”. Update dengan konfigurasi seperti ini:
##
# You should look at the following URL's in order to grasp a solid understanding
# of Nginx configuration files in order to fully unleash the power of Nginx.
# http://wiki.nginx.org/Pitfalls
# http://wiki.nginx.org/QuickStart
# http://wiki.nginx.org/Configuration
#
# Generally, you will want to move this file somewhere, and start with a clean
# file but keep this around for reference. Or just disable in sites-enabled.
#
# Please see /usr/share/doc/nginx-doc/examples/ for more detailed examples.
##

# Default server configuration
#
limit_req_zone $binary_remote_addr zone=one:10m rate=6r/m;

server {
        listen 8081 default_server;
        listen [::]:8081 default_server;

        # SSL configuration
        #
        # listen 443 ssl default_server;
        # listen [::]:443 ssl default_server;
        #
        # Note: You should disable gzip for SSL traffic.
        # See: https://bugs.debian.org/773332
        #
        # Read up on ssl_ciphers to ensure a secure configuration.
        # See: https://bugs.debian.org/765782
        #
        # Self signed certs generated by the ssl-cert package
        # Don't use them in a production server!
        #
        # include snippets/snakeoil.conf;

        # root /var/www/html;

        # Add index.php to the list if you are using PHP
        # index index.html index.htm index.nginx-debian.html;

        server_name _;

        location / {
                # First attempt to serve request as file, then
                # as directory, then fall back to displaying a 404.
                # try_files $uri $uri/ =404;
                proxy_pass http://localhost:8080;
                proxy_http_version 1.1;
                proxy_set_header Upgrade $http_upgrade;
                proxy_set_header Connection 'upgrade';
                proxy_set_header Host $host;
                proxy_cache_bypass $http_upgrade;
        }

        # pass the PHP scripts to FastCGI server listening on 127.0.0.1:9000
        #
        #location ~ \.php$ {
        # include snippets/fastcgi-php.conf;
        #
        #       # With php7.0-cgi alone:
        #       fastcgi_pass 127.0.0.1:9000;
        #       # With php7.0-fpm:
        #       fastcgi_pass unix:/run/php/php7.0-fpm.sock;
        #}

        # deny access to .htaccess files, if Apache's document root
        # concurs with nginx's one
        #
        #location ~ /\.ht {
        #       deny all;
        #}
}


# Virtual Host configuration for example.com
#
# You can move that to a different file under sites-available/ and symlink that
# to sites-enabled/ to enable it.
#
#server {
#       listen 80;
#       listen [::]:80;
#
#       server_name example.com;
#
#       root /var/www/example.com;
#       index index.html;
#
#       location / {
#              try_files $uri $uri/ =404;
#       }
#
Perhatikan!
Saya melakukan listen di port 8081 dan akan mengirimkannya ke port 8080. Kita juga mereplace page default NGINX.
- Mari kita restart service nginx.
sudo service nginx restart- Pastikan sudah OK.

Alternatif
- Jika masih tidak berjalan dengan baik, alias mendapatkan 502. Kamu bisa ganti localhost menjadi nilai dari nameserver berikut (sesuaikan dengan komputermu ya).
cat /etc/resolve.conf
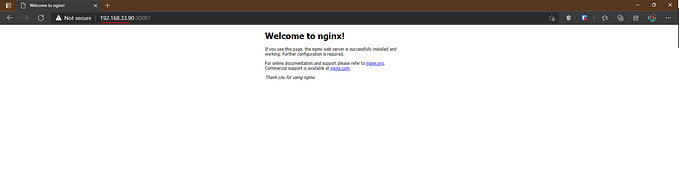
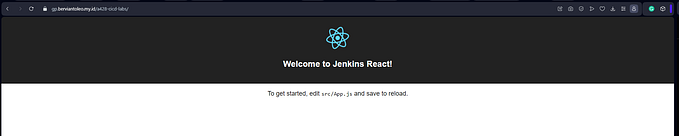
Hasil
Hasilnya akan seperti ini.
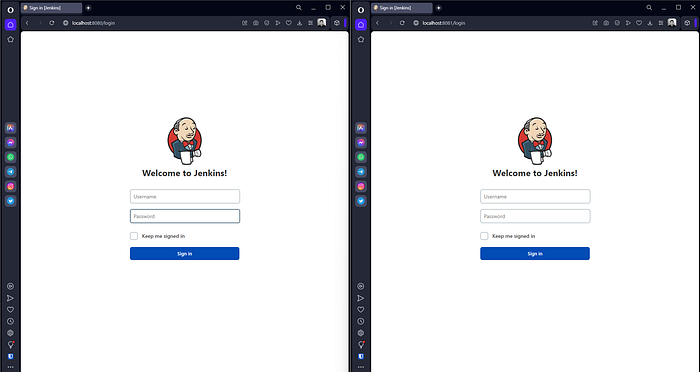
Kedua port tersebut mengarah ke container yang sama. WSL sudah menyediakan fasilitas untuk bisa sharing port dengan mudah jadi cukup mudah untuk sharing aplikasi yang sedang berjalan. Namun perlu dicatat yaitu kamu perlu memastikan ingat port yang sudah dijalankan ya, biar tidak bingung kok tidak bisa dipakai.
Terima Kasih
Terima kasih sudah membaca. Semoga bermanfaat.